Making rope bindings may seem daunting but is not all that complicated once you know how.
The basic steps are:
- Cutting long strips of excess back or side wood, or dedicated side wood purchased just for this.
- Gluing the alternating strips wide side together.
- Pressing the strips together while they dry.
- Run the assembled strip through a thickness sander to make them uniform thickness.
- Cutting the strips on a 45 degree angle.
- Gluing these strips together end to end on a veneer.
- Add veneer to the other side.
- Cut this completed diagonal strip into individual binding strips.
The details for each step are:
1. My goal is to make approximately 5mm or .2” square bindings.
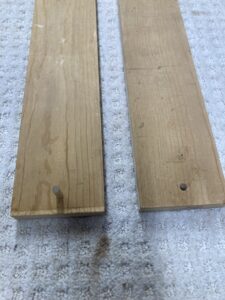
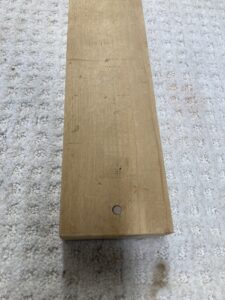
Ideally you should get at least 6 strips of each color of wood about 20” long and cut .25” wide. The side wood should be about 3/16’ thick, and sanded smooth on both flat sides before cutting the strips. The more strips you use, and the longer the strips, the more useable binding strips you will have when finished.
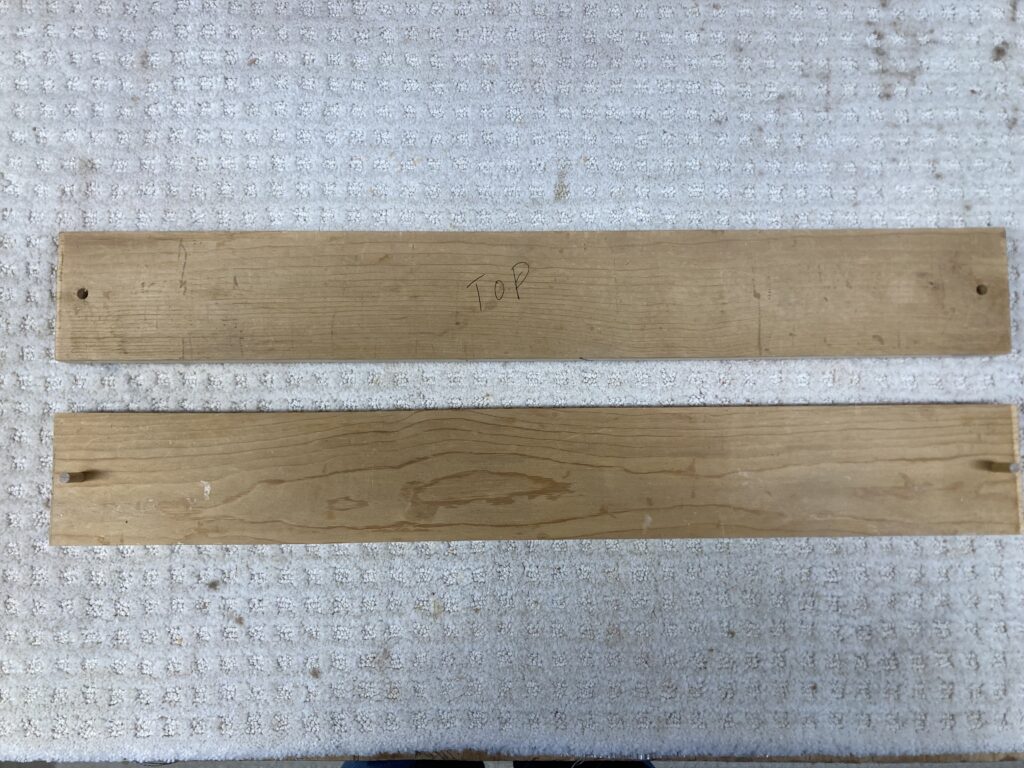
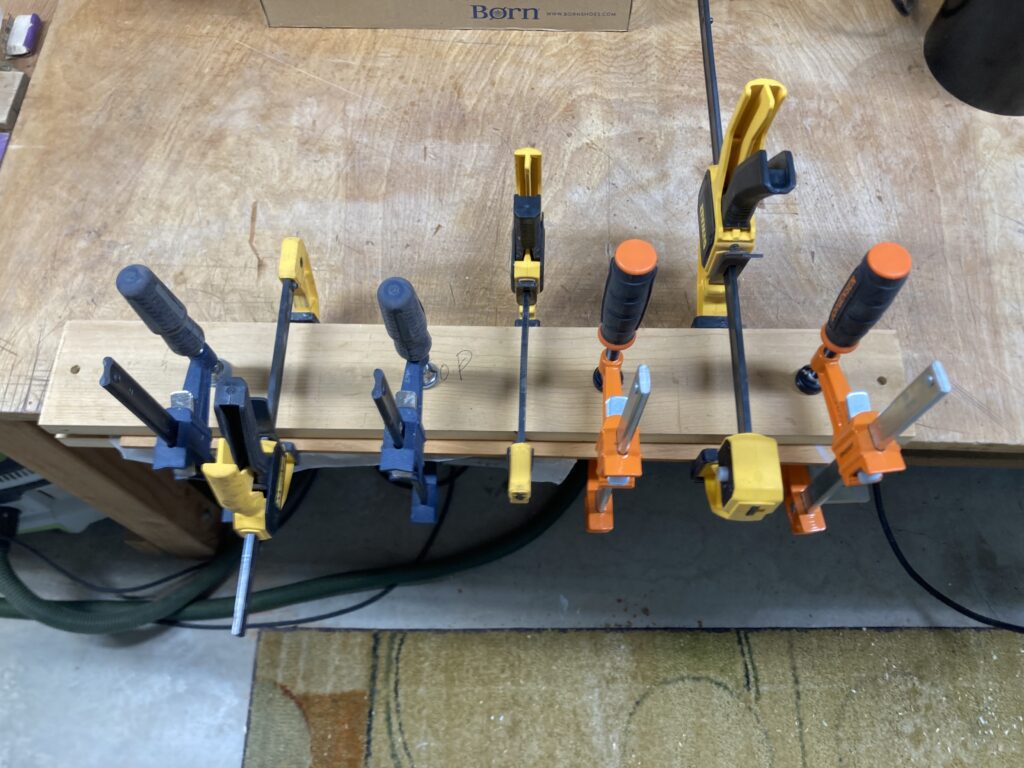
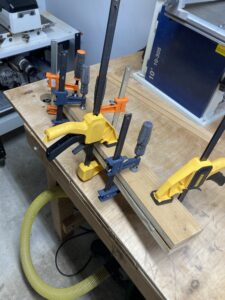
You will need to make a Binding Making Press to assist in gluing the strips together in the next step. Mine is about 24” long and about 4” wide. Basically two flat boards that are mated at the ends with a dowel that extends up from the bottom board, and the top side can slide down onto. This prevents the two boards from slipping and moving during clamping. Put the two boards together and drill through both at the same time making a hole the diameter of your dowel, and glue the dowel into the bottom board. I use this press to laminate wood onto veneers which I cut into strips to make simple bindings.
To make these rope bindings you will also need 2 pieces of extra wood that are thinner than the binding and an inch or more wide and as long as you’re binding press. These will be used to press in on sides to make sure the finished glued strips are straight and tightly joined together. These strips are in a later photo.
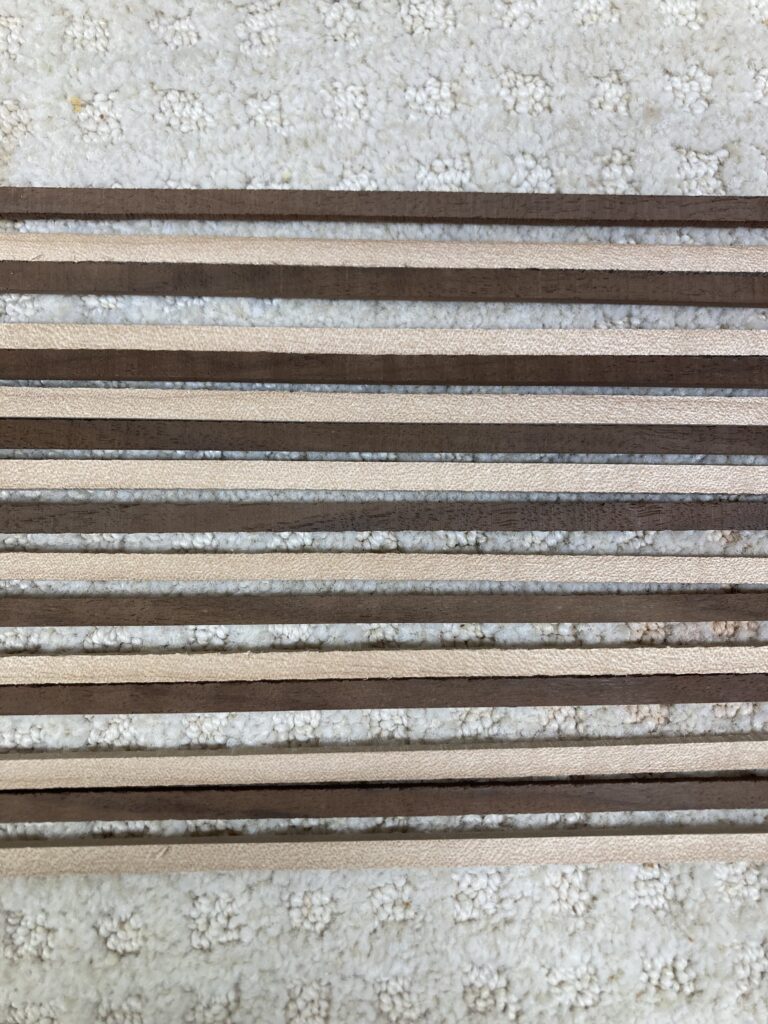
2. I mainly use hide glue to assemble the side strips into one long piece. I tried Titebond but it was more difficult to smooth the sides in the drum sander later, tending to bog down the machine, whereas the hide glue sanded smoothly and effortlessly. Alternate the colors, but be sure to have the opposite colors on each end. That way when lining up the diagonally cut pieces later, a dark will be next to a light wood. Glue the strips together with the wide sides together working on top of some wax paper setting on the top of the bottom Binding Press board. Work quickly adding the each new strip to the assembled strips. It will be messy. The 2 thinner strips are at the top of the photo which will press the sides in while drying.

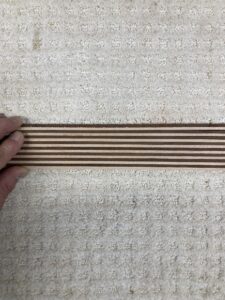
3. Fold the remaining wax paper over the top and press on the top piece of the Binding Press. Lightly clamp the top and bottom together, and press in the side pieces in with clamps, and then tighten all the clamps. Let this set for at least overnight. If you need to verify that the strips are all tightly assembled, it can be briefly unclamped after 10 – 15 minutes to view, and then re-clamped.
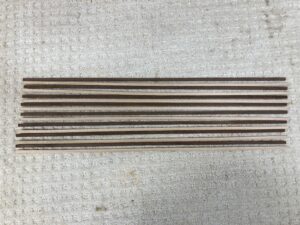
4. When the strip has thoroughly dried, run it through a drum sander to clean up and smooth both sides and assure even thickness. You may need to let it sit another day or so with a weighted board on top to complete drying and keep it from warping before drum sanding.
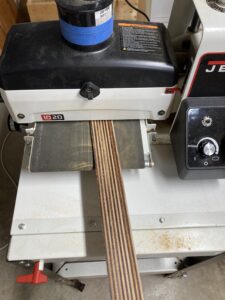
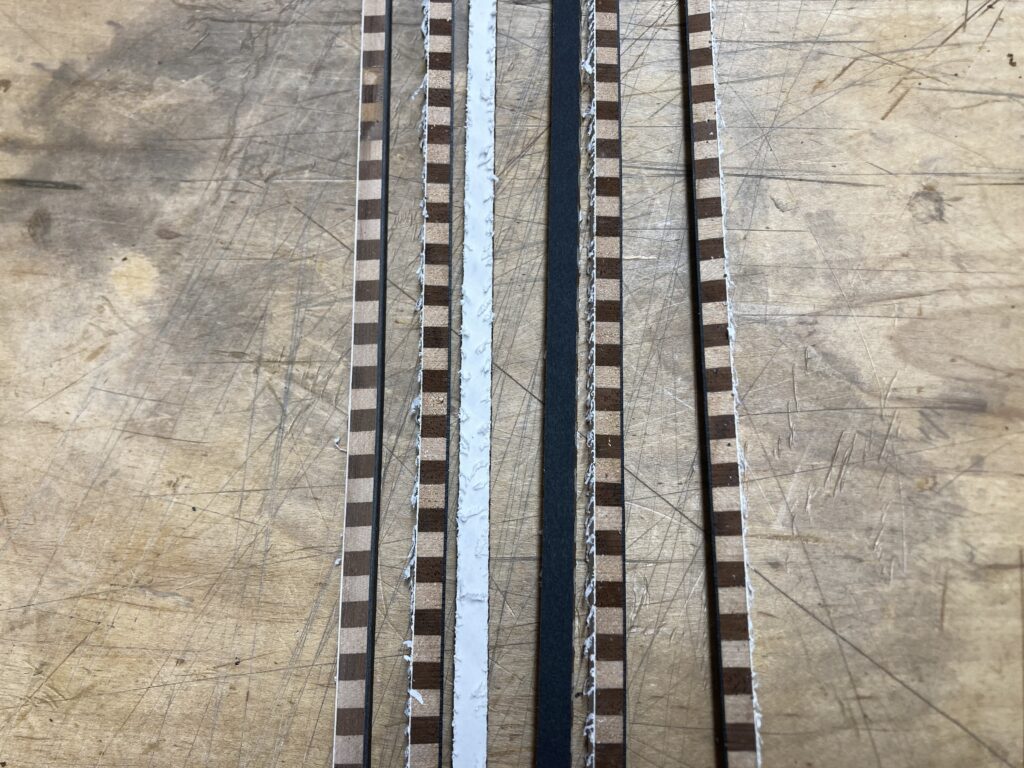
Smooth both thin edges, the dark and light, as these will be gluing edges in another step.
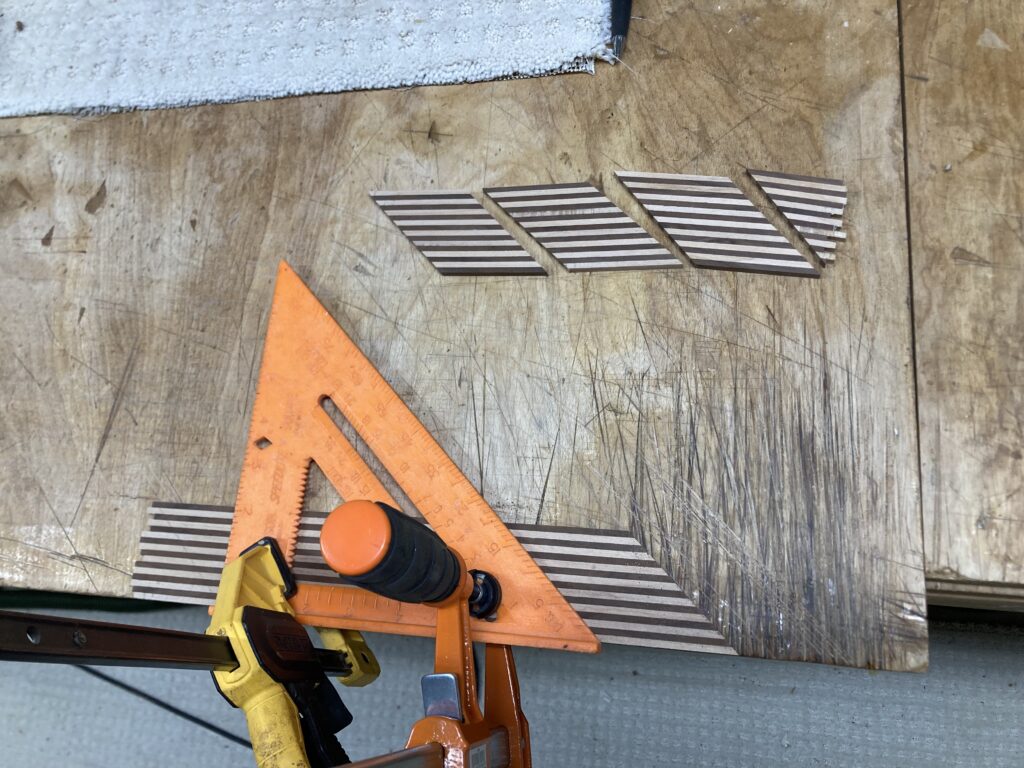
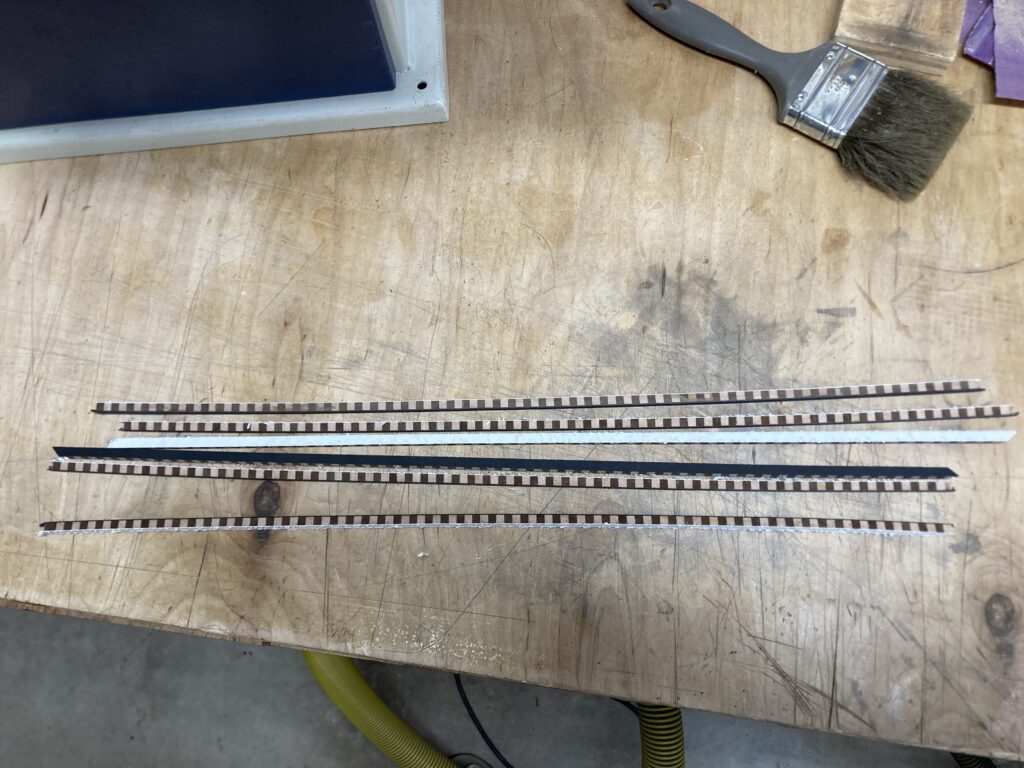
5. Use a miter box if you have one to cut the 45 degree angle, or in my case I clamped a roofers square along one edge and used it as a cutting guide. The roofers square has a raised lip along one edge to hold the strip squarely. Cut the first 45 degree angle from one end without wasting any material. From there you need to do your own calculation as to how wide to cut each 45. If you measure perpendicular to the cut edge it will give you the width of your finished binding strip, to calculate how many binding strips you will cut from that. Allow extra for saw kerf and trimming final edge to square before cutting binding in the final step. Measure your decided cut spots along the entire edge, and cut them all to 45 degrees.
In this case my diagonal edge was 3″ and I could cut every 2.5″ which gave me 7 pieces for a final product of 21″ .
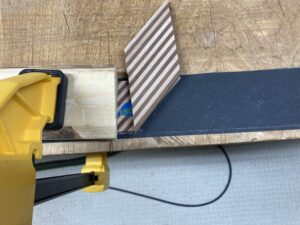
6. These little pieces can then be lined up with white meeting dark to approximate the final construction. Cut a strip of veneer .02″ or .01″thick in your preferred color, wider than your final strip will be to allow for progressive error as you work your way down, and a little longer than the approximated assembly is. I recommend Titebond II for assembling the pieces to the veneer, because you don’t want this glue to come off the little rope peices while bending later, since it is more resistant to softening in water. I also recommend using fiber veneer as it is stronger and more flexible than wood veneer as a backing for your finished binding strips.
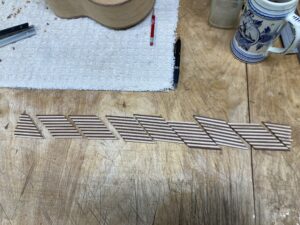
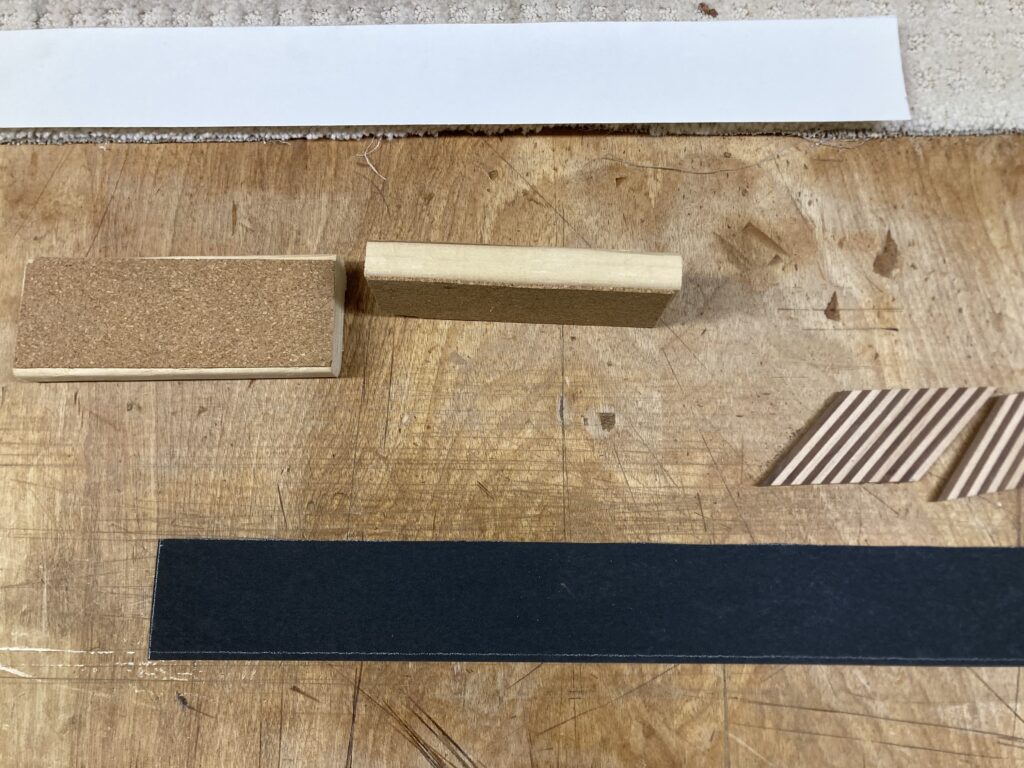
Mark 2 guide lines on the cut veneer that you intend to line up the sides of the little diagonal strips along for gluing. Line up 2 pieces of diagonal pieces tightly together, and tape them together along the top. Bend up one piece and glue the joint, then glue the 2 pieces along the guide line of the veneer. Place a weight on top to hold in place. I use a 6” piece of wood with cork board glued to the bottom as my joint holder, and clamp it down lightly.

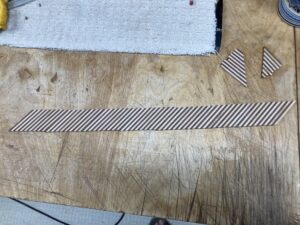
After a few minutes, the glue has set, and continue adding one more piece, tape top, bend back, glue down, and clamp. Continue until they are all assembled and transfer to the Binding Press to hold in place until the glue has set.
7. Apply a second veneer which is thinner, .01″, and will eventually be sanded off, to the opposite side. The purpose of this veneer is to hold the bindings together while bending. Glue and press into place with Binding Press.
8. When all the glue is completely dry and hard, clean up and straighten one long edge for running through a band saw.. I use a small sharp plane to take off most the excess veneer overlap and glue, then sand smooth and flat.
Cut the binding to your desired width, clean up, and you are done.
Good luck with the bending and installation on your instrument. After more trials, I find bending on a heat blanket and fox type bending form is quicker and more uniform, and then detail the bends as needed on an iron. It is also easier to bend with the wood side on the inner and outer edges of the bend, which would leave the black binding in this case against the side wood when complete, and the white side on top, which would be sanded off. The joints between white and dark may open up and can be filled with CA or lacquer stick.
Kevin